Create a README.md for your GitHub profile
This tutorial describes how to create a README.md for your GitHub profile using the GitHub website.
-
If you haven’t already, sign up for a GitHub account.
-
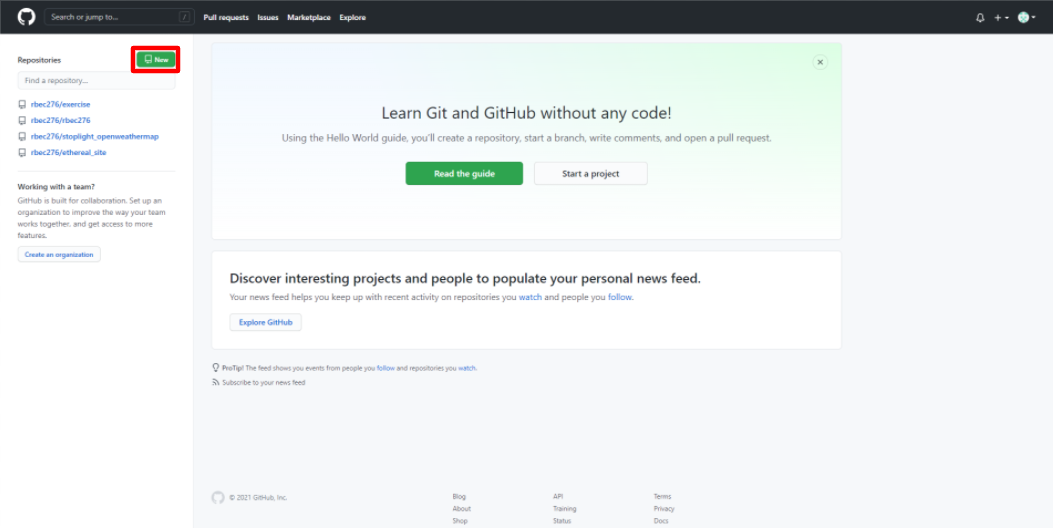
Sign in to your account and create a new repository by clicking New.
-
In the new window, take the following actions:
a. Name the repository after your GitHub username. For example, if your GitHub username is abc123, your repository name shall be abc123. This ties the new README.md file to your profile.
b. Make sure the repository is set to Public.
c. Check the box to Add a README file.
d. Click Create Repository.
-
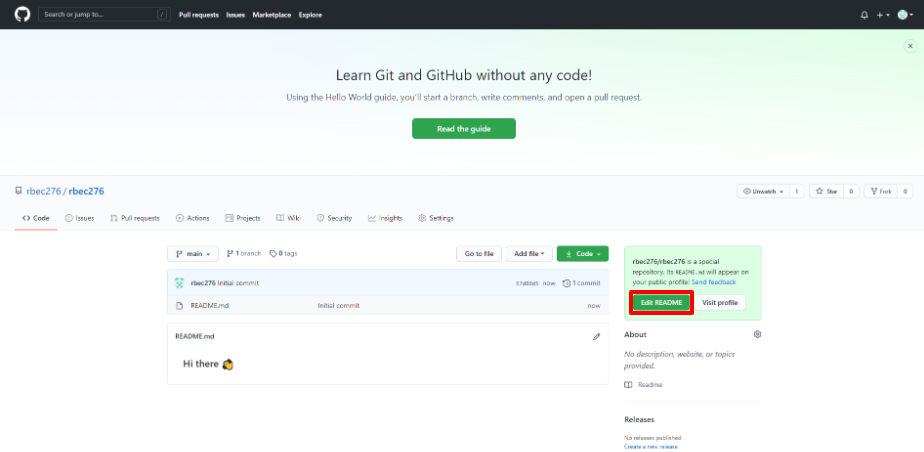
See your new repository and README.md file.
-
Click the Edit README.md button to update your README.md file.
-
Add your content. You can use the GitHub template for inspiration.
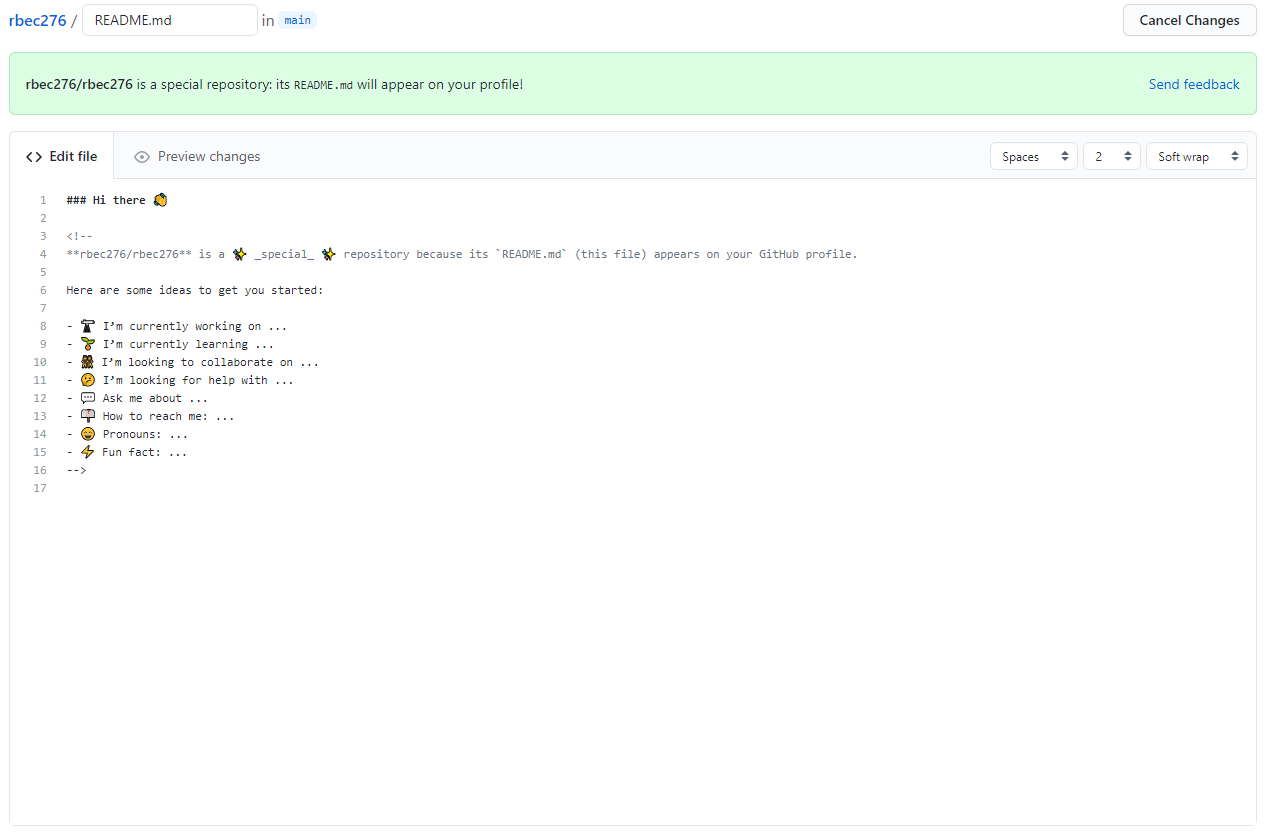
Note: Text enclosed by <!– and –> is called a comment. Comments are notes to provide context to people reading your code and they won’t show up in the rendered output. If you use the GitHub template, make sure you delete the comment syntax; that is, the <!– and –>.
-
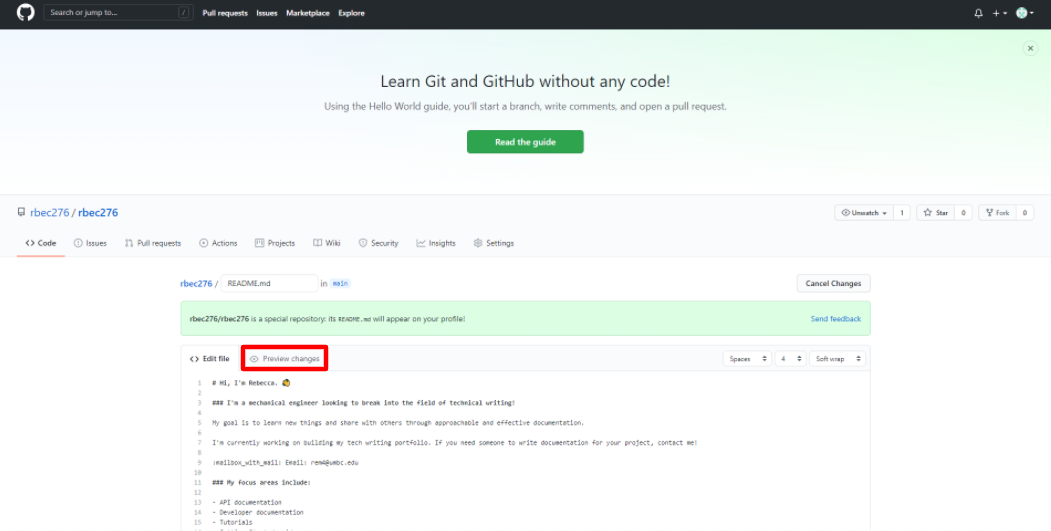
Click the Preview Changes tab to see the rendered version of your .md file.
-
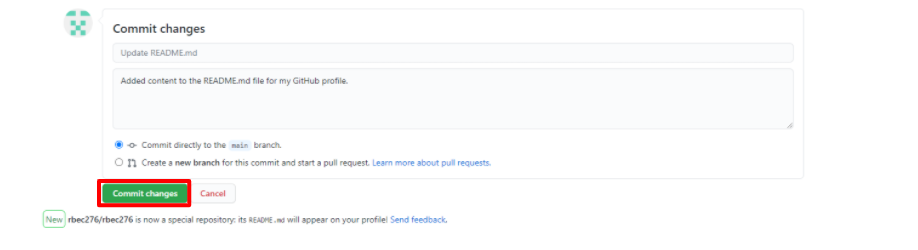
Scroll down to add a commit message and description.
Note: Get in the habit of writing clear and concise commit messages–this makes your file history easier to follow. Your future self (and collaborators) will thank you!
-
Commit changes directly to the main branch.
-
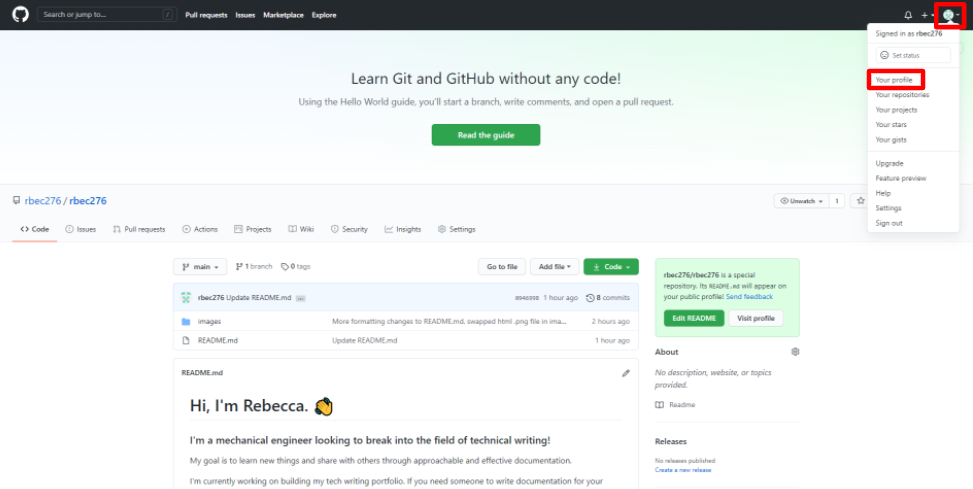
Click the dropdown arrow next to your avatar in the top right. Select Your profile to see your new and improved GitHub profile with README.md file!