Set up your live stream using Twitch Studio
Before you start
If you haven’t installed Twitch Studio, see Installing Twitch Studio. When you reach the app’s main screen, proceed with the tutorial.
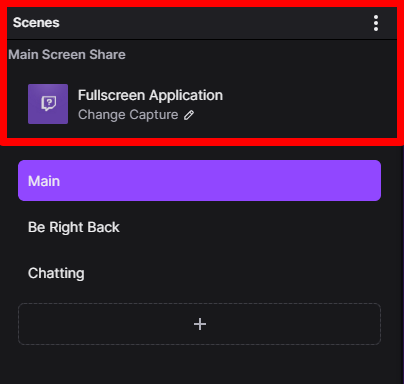
Step 1. Capture gameplay
Open the game you want to stream. Return to the app and locate the Scenes panel. Under Main Screen Share, click Change Capture.
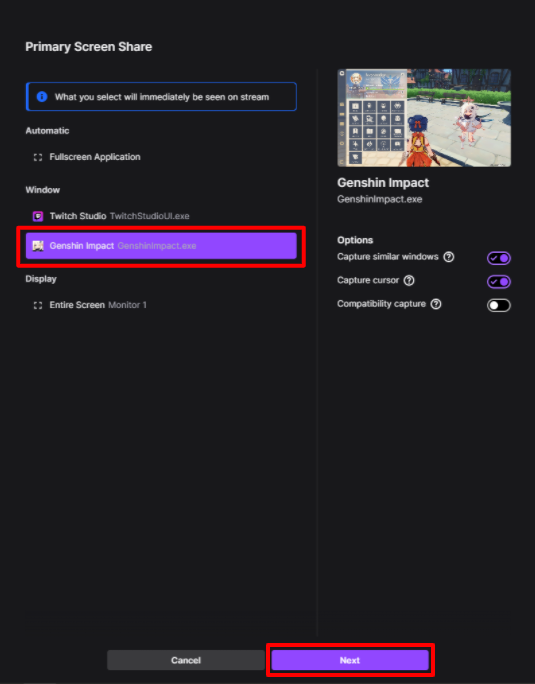
In the new dialog, select your game window from the list of applications. Click Next.
Step 2. Add a title
Give your stream a title, category, and one or more tags. You can also specify the stream language.
Note: Complete and accurate stream info helps make your content discoverable.
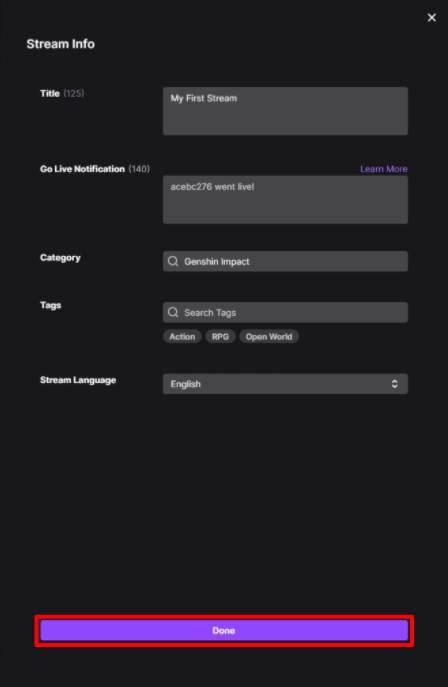
Click Done.
Step 3. Customize scenes
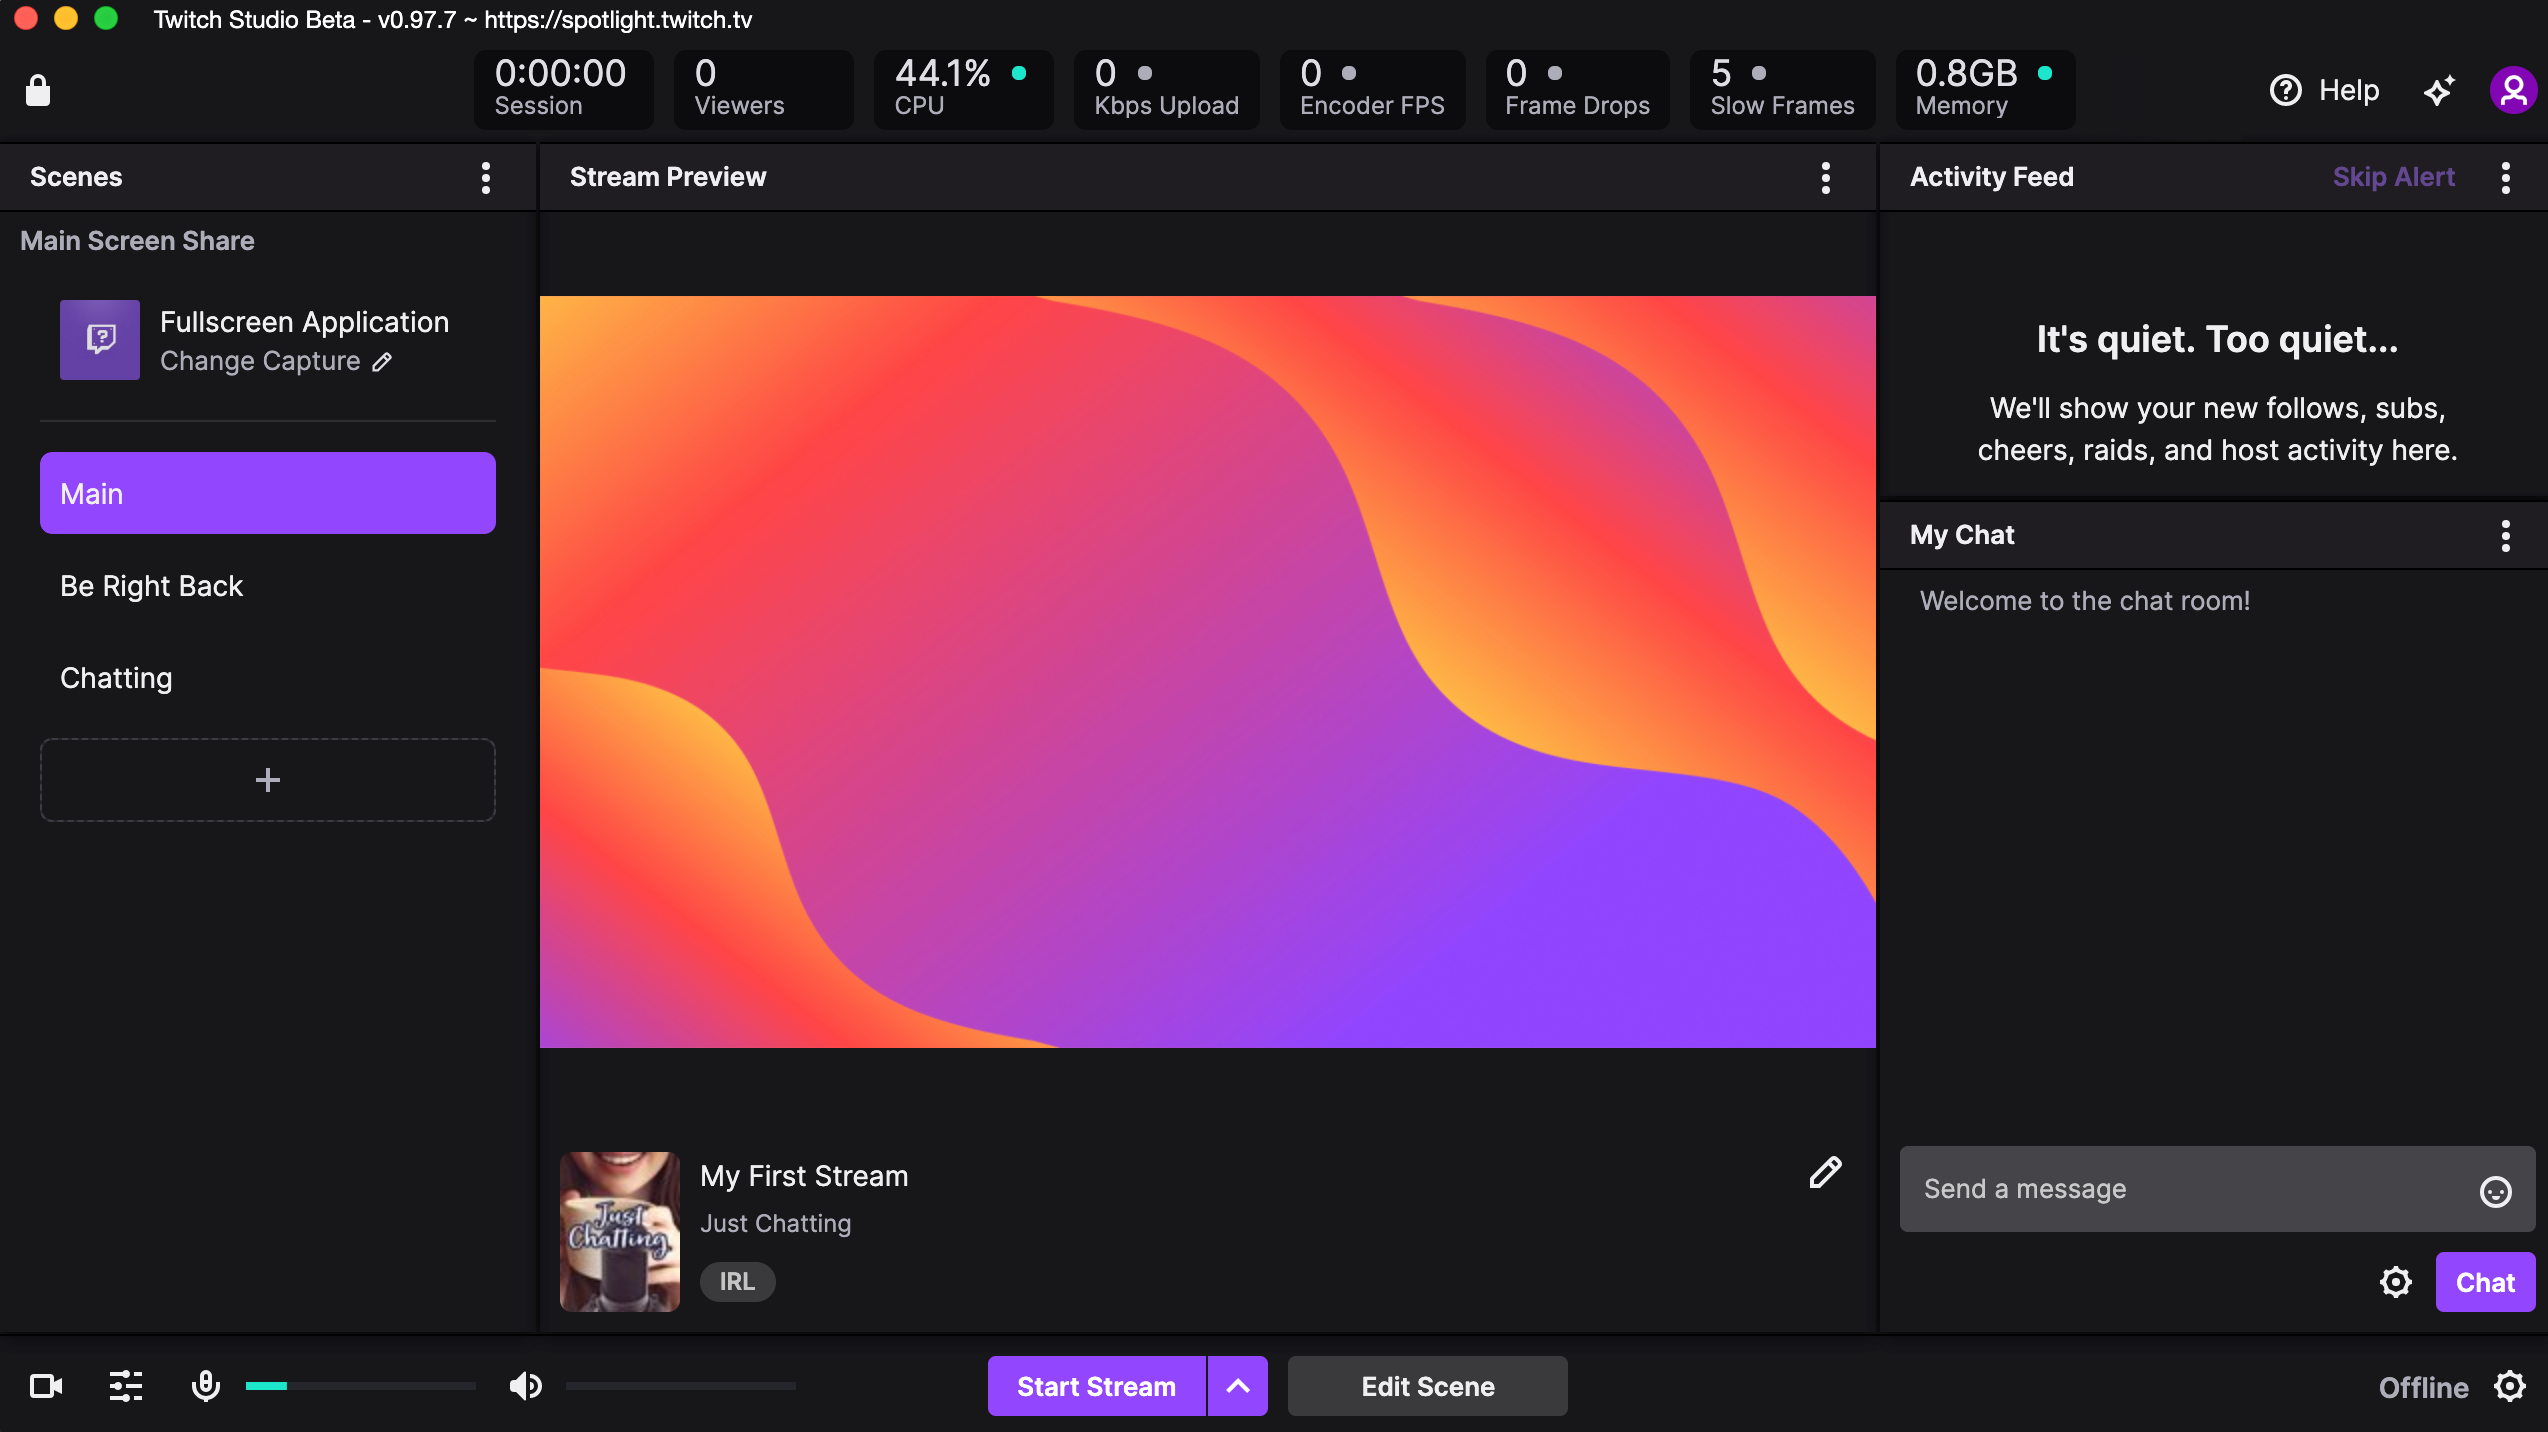
Select a scene from the Scenes panel to display it in the Stream Preview window.
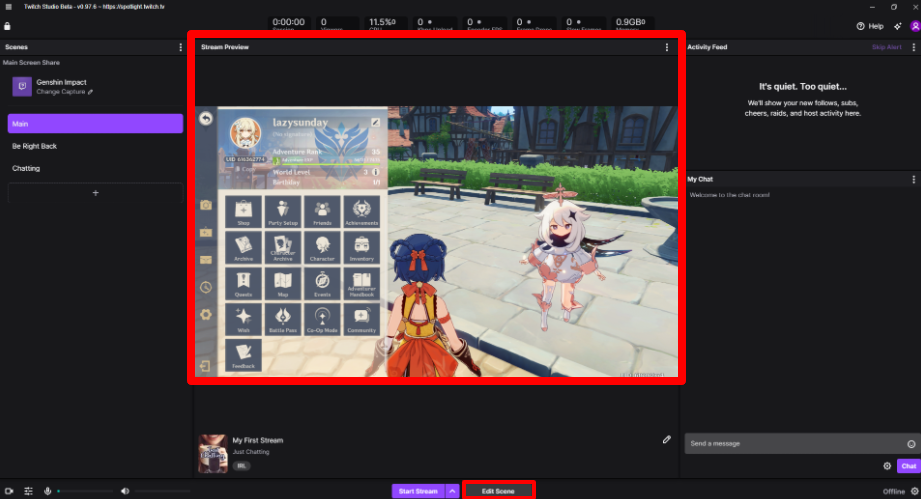
If you want to make changes to the selected scene, click Edit Scene.
In the editor, you can fully customize your scenes. Some functionality includes:
-
Accessing Twitch Studio’s media library of images, patterns, and wallpapers.
-
Changing position, color, and content of text and screen captures.
-
Adding alerts and deciding how they show up in your stream.
When you’re done making changes, click Save to return home.
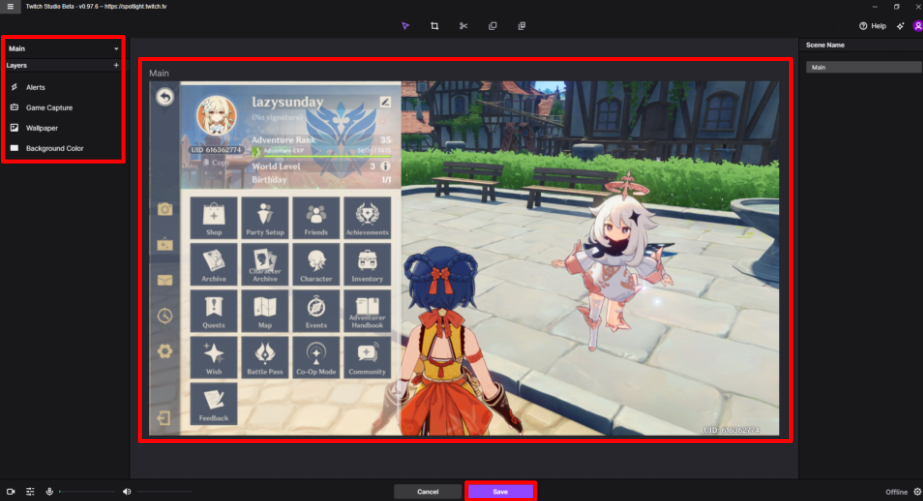
Note: What you see in the Stream Preview window is exactly what your viewers see when you go live. Take a minute to review your scenes and make sure everything looks good.
Step 4. Start streaming
You’re ready to go live! Click Start stream. Monitor and manage your stream at any time from the app. To end your streaming session, click Stop stream.
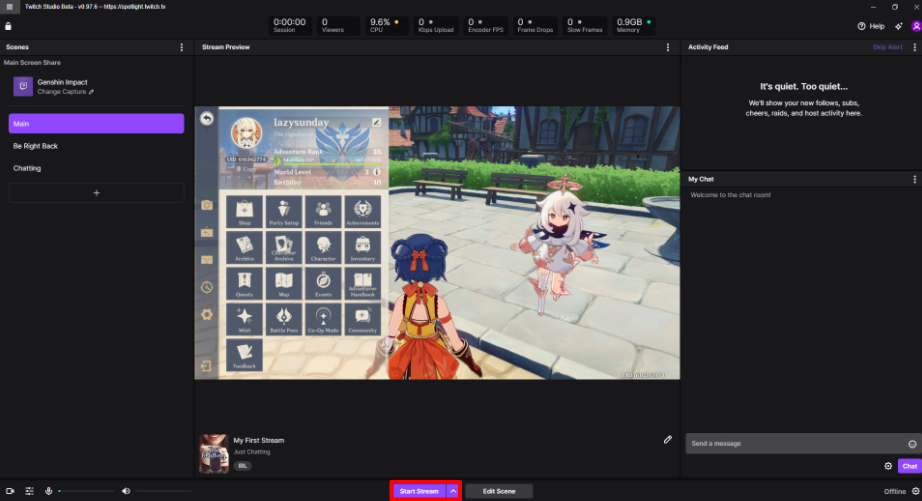
If you want to learn more, see the Twitch Studio user interface reference guide.